9.2 React Tooling & Setup
# React
React is an open-source project, heavily sponsored by Facebook. It is the most popular modern JavaScript library for building user interfaces. It provides a declarative framework for building data-driven user interfaces and efficiently manages updating the DOM with just the components that have changed; minimizing full-page re-paints.
React provides the foundation for and strongly encourages the use of best-practice software application design patterns.
Over the next few exercises, you will learn some of the basic concepts of React and how it relates to what you already know. We will take a software development journey from Vanilla JS to JSX.
The React Official Website (opens new window) can be used as reference documentation as well as a source for tutorials.
# React Tooling
# Tools In Chrome
To help you with your development work in the Browser there is an official extension for Chrome called React Developer Tools. You should download and install it in chrome (opens new window).
# Tools in VSCode
For VSCode, we recommend that you install the ES7+ React/Redux/React-Native Snippets extension. It will give you lots of keyboard shortcuts that you can use for common tasks.
# ES7+ React Snippets extension
You should have already installed the `ES7+ React Snippets extension.
Here is the full list of all the keyboard shortcuts (opens new window)
A few common ones that you will find helpful are:
ednf - becomes `export default function first(second) {third}`
dar - becomes `const [second] = first`
imd - becomes `import { second } from 'first'`
imrse - becomes `import React, { useState, useEffect } from 'react'`
2
3
4
Here is the full list of snippet abbreviations (opens new window)
# The React Toolchain
React apps can be built by simply adding a <script> tag to your webpage that points to the React script. You can then use the React framework in your pages.
However, up until recently there was a tool called create-react-app which was used to create, build, and manage the majority of React projects. When we use create-react-app we are letting this
package do most of the work for us in downloading, installing, and configuring all the tools like Webpack. Webpack was responsible for using Babel to convert the React JSX code into HTML and
JavaScript. It also compiles and combines files and does hot reloading, which will will talk about later.
Starting in 2023 the recommended tool for creating and managing React projects from the command line switch to Vite. The Vite website (opens new window) will be what we are using to create
our React JS projects.
# React Setup with Vite
The old build tool, create-react-app used webpack to build the React projects. The vite command-line tool uses Rollup v4 (opens new window) as the module bundler, and the Rust-based Speedy
Web Compiler SWC (opens new window) to compile and transpile the project code.
With Vite you can use either JavaScript or Typescript to code your project.
It requires Node v18.20.x or higher.
To create your project run the following:
npm create vite@latest my-app-name
This will then prompt you for a type of project. Use the arrow keys and return to select React and then JavaScript + SWC from the list.
This will set up all the base files for the project and have a folder structure similar to this:
my-app-name
├── .eslintrc.cjs
├── .gitignore
├── index.html
├── README.md
├── package.json
├── vite.config.js
├── public
│   └── vite.svg
└── src
    ├── assets
    │   └── react.svg
    ├── App.css
    ├── App.jsx
    ├── index.css
    ├── main.jsx
    └── setupTests.js
2
3
4
5
6
7
8
9
10
11
12
13
14
15
16
17
Note the lack of node_modules. The initial set up runs really quickly because it is just installing these files. Once this step is done, you need to navigate into that folder and do the node
install, before starting the dev server.
cd my-app-name
npm install
npm run dev
2
3
In the package.json file, if you look in the scripts section there are three commands that you will run. dev, build, and preview. The dev command will launch the development version of your
React site. The development version runs the site in memory. It doesn't actually do the compilation, optimization, and compression that happens when you create the production version.
Once you use npm run dev, you will be able to open http://127.0.0.1:5173/ in the browser.
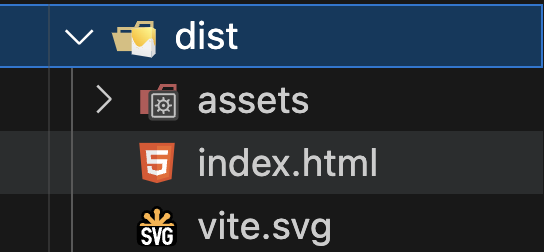
The build command will actually do the compilation, optimization, and compression. It creates a dist folder which will contain the compiled version of the site.
main.js includes this bit of code which tells React to locate a div with the id "root" inside the first generated HTML file. This element will be the root of your web app. It then calls a render()
method. If you remember our previous discussions about the Virtual DOM and creating the DOM from that, then this is our function to create the UI elements.
Inside the render method we have something that looks like HTML. There is a root <React.StrictMode> element with an <App /> inside it. The <App /> element is whatever component was imported
from the /src/App.js file.
import React from 'react';
import ReactDOM from 'react-dom/client';
import App from './App.jsx';
import './index.css';

ReactDOM.createRoot(document.getElementById('root')).render(
  <React.StrictMode>
    <App />
  </React.StrictMode>
);
2
3
4
5
6
7
8
9
10
Remember
Press CTRL + c in the terminal to stop the web server.
# The Production Version
The development web server includes lots of things to help streamline the development process, like hot-module-replacement and source maps for debugging. You do not want to include these in production.
For a production deployment, we need to have Webpack optimize the code by stripping out anything that is not absolutely needed and compile the JavaScript down to an older (more broadly compatible)
version. Lets try this out by running the npm run build command in the terminal / command prompt.
npm run build
This will compile the project and place the output files into the dist folder.
OR instead of using npx serve, you can use the npm run preview command from package.json. This will serve the dist version of the site so you can test it on your local computer.
The production build can be now be tested in your browser @ http://127.0.0.1:4173/ (opens new window).
When you host on Vercel, you will configure the project to run the build command and then set the dist folder as the home for the website. More on this later.
# What to do this week
TODO Things to do before next week.
- Read all the content from
Modules 9.1, 9.2. - Read the Hybrid section notes about
Litfor creating web components - Read the Getting Started section of the React Website (opens new window)
- Start watching the React Tutorial Playlist (opens new window)