1.2 Git & Pull Requests
# Git Pull Requests
When you file a pull request, all you’re doing is requesting that another developer (e.g., the project maintainer) pulls a branch from your repository into their repository. This means that you need to provide 4 pieces of information to file a pull request: the source repository, the source branch, the destination repository, and the destination branch.
When you are working with another developer on the same repository you will need to be able to merge code together into the same branch.
Atlassian guide to pull requests (opens new window)
Github guide to pull requests (opens new window)
GitKraken guide to pull requests (opens new window)
# Creating and Merging Branches
Let's say that you have a repository called monkey-works and you are currently looking at the main branch.
In order to add some new functionality to the repository we want to create a new branch for testing the code for the new functionality. The main branch is the one that is typically used as the
production version of the code. Other branches are often called "feature" branches. You can think of each branch as a different version of your project.
To switch between branches in a repository, we use the git checkout command:
git checkout branchName
If you want to create a new branch and switch to it at the same time, it is the same command but we put -B in front of the new branch name.
git checkout -B newBranchName
After you have used the new branch and finished writing the new version of the project code, you can do a git merge if you want. You can merge the code in your branch back into the main branch.
However, doing that only merges the code locally and does not allow anyone else to review the changes.
Instead of doing that, the best practice is to have the main branch protected so that it requires pull requests and code reviews be done on the server.
Step one in this process would be for you to push the latest commits of your new feature branch to the server. This will create, if needed, the new branch and then upload the new version of the code to the server.
git push origin newBranchName
# Protecting the Main Branch
On Github, you can go to the Settings section, and select the Branches link in the left-hand menu. Then click on the Add Protection Rule button.
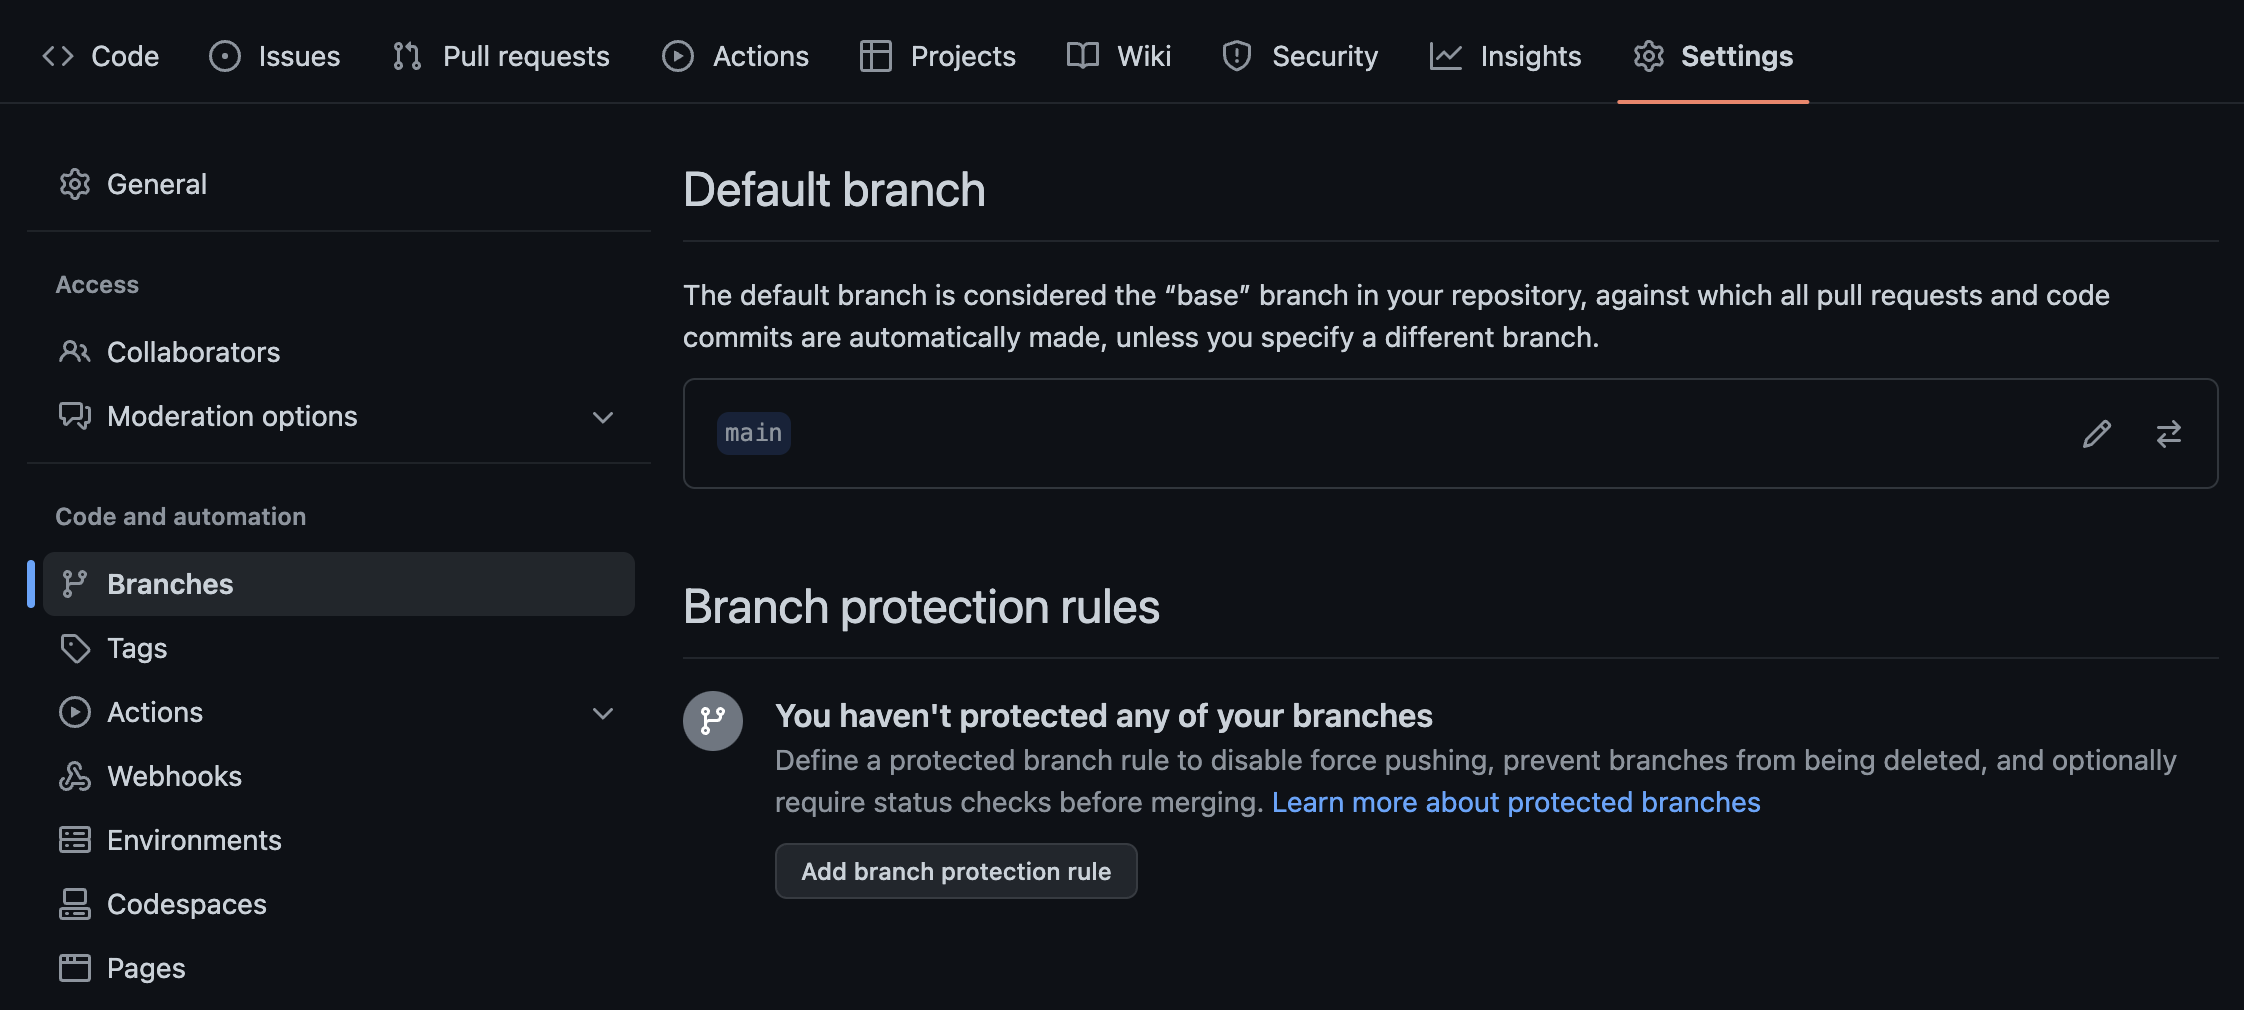
Next, enter main in the input as the pattern to match for the branch name to protect. Then, below that, select the checkboxes for
- Require a pull request before merging
- Require approvals
- Require review from Code Owners
Finally, click the Create button.
These options will mean that the owner of the repository will be responsible for reviewing, approving, and handling the merges of any branch into main.
# Pull Requests
With the branch protection rule set up for the main branch Pull Requests can now be properly made.
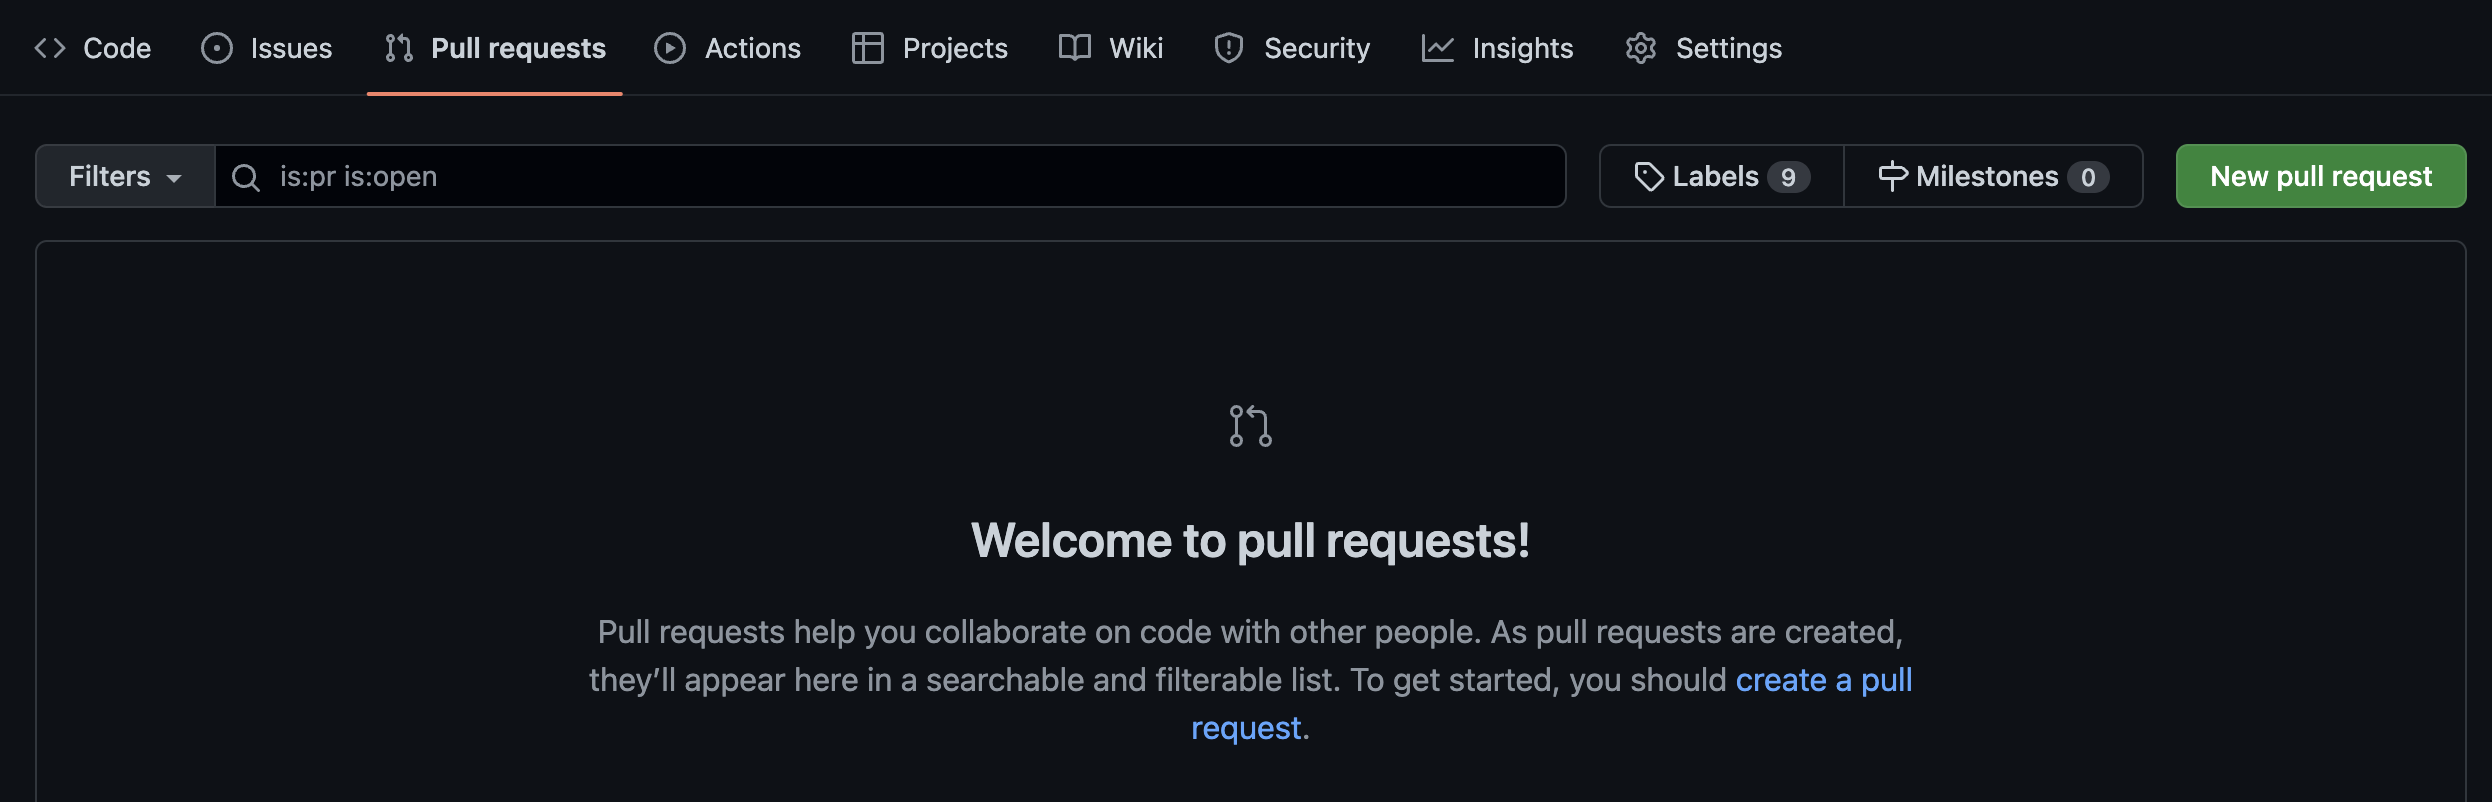
After you do a git push to upload your new feature branch, then you go to the Pull Request section of the repository and click the New Pull Request button, as seen in the image above.
On the Comparing changes screen, there are two dropdown lists. The first one should be set to main, the second (compare) one should be set to the new branch that you want to merge.
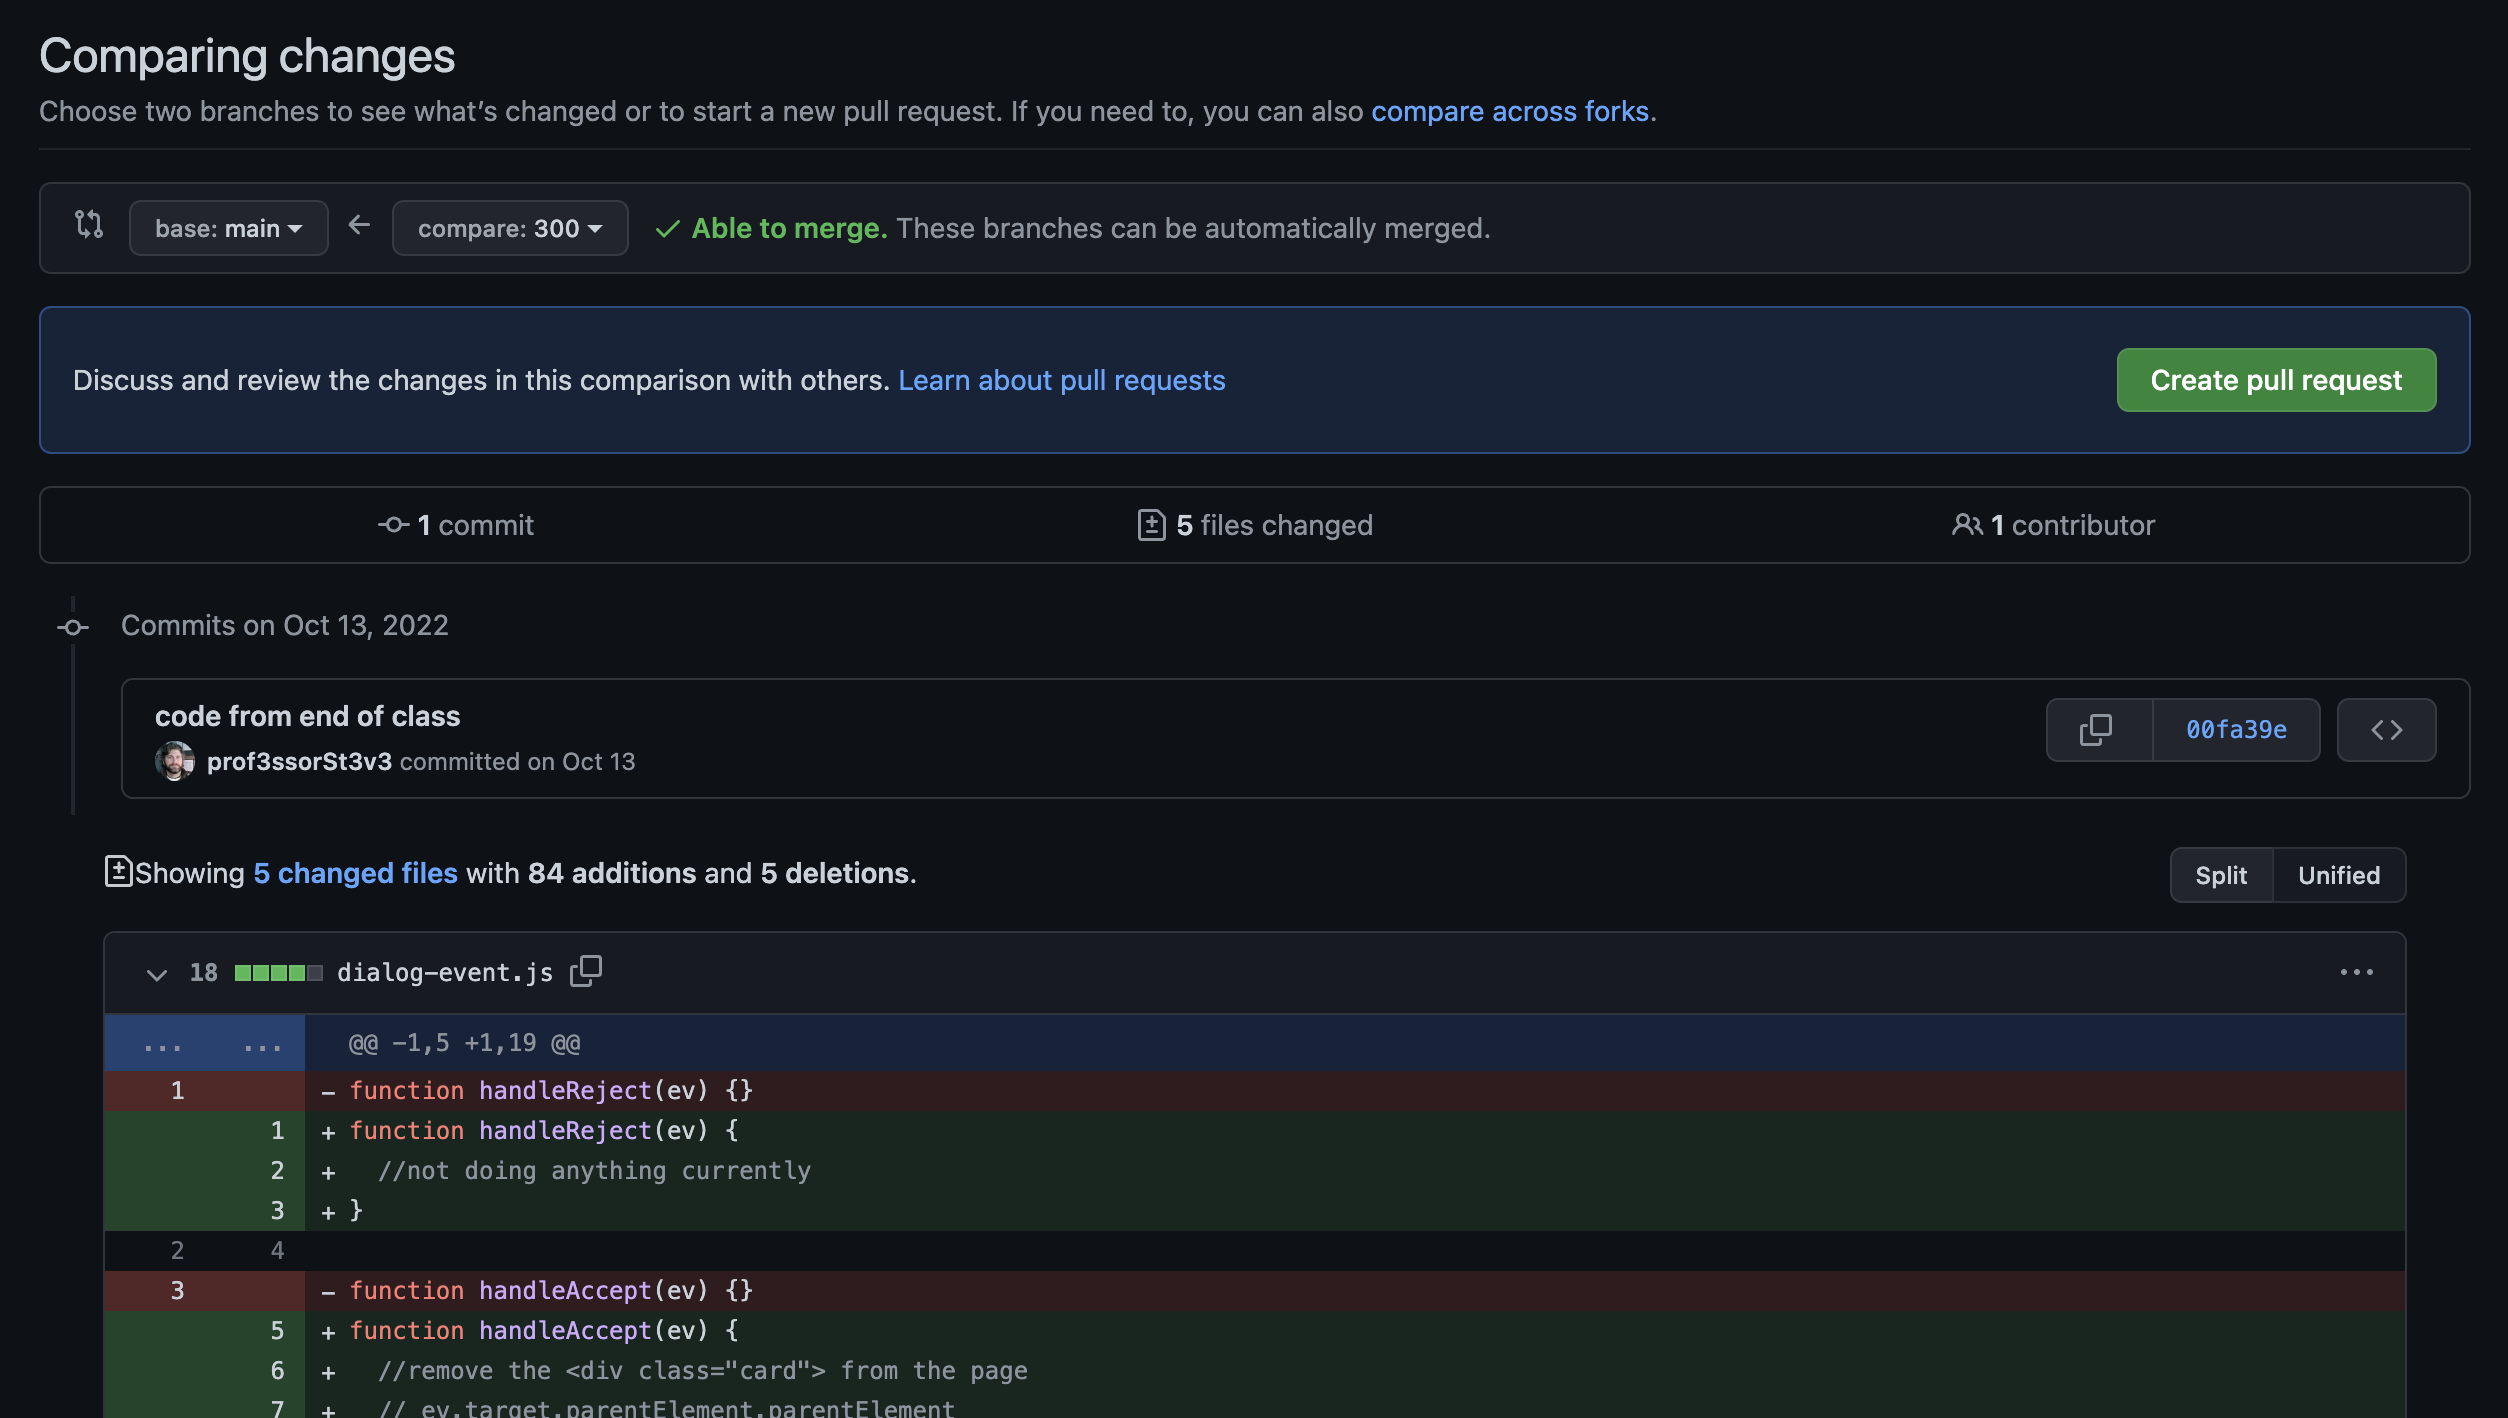
Github will automatically display the files that will be altered by the merge and tell you if an automatic merge is possible. Click the green Create Pull Request button.
You will then be able to write a note that details what the changes are for reviewing and then click the new Create Pull Request button. At that point, the Pull Request is ready to be reviewed by
the Code Owner.
If you look at the Pull Request tab at the top of the screen, it will have a badge with the number of Pull Requests that are ready to be reviewed by the code owner.
# Object Creation
In JavaScript, everything that can be held in a variable is either a Primitive value or an Object. So, if it is not just a value like a String, Number, Boolean, null, undefined, BigInt, or Symbol, then it is automatically an Object.
Objects are created by a constructor function, like these.
new Array();
new Object();
new Function();
new Date();
2
3
4
Some things, like Array and Object also have a literal version. You can literally write the contents of the object and it will be passed internally to the constructor function.
let obj = {
  id: 123,
  alive: true,
  message: 'this is an object literal',
};

let arr = ['Adesh', 'Anoop', 'Tony', 'Steve', 'Array literal'];
2
3
4
5
6
7
When you need to create your own Objects then you can do it with an Object literal. The keys must all be Strings. The values can be anything you want - Primitive values or other objects.
When you add a Primitive value to an object, you are always getting a copy of that value assigned to the key. If you add an object as the value, you don't get a copy of the object, you get a reference to the object.
let obj = {
  program: 'MAD&D', //Primitive copy of the string
  instructors: ['Steve', 'Adesh', 'Tony', 'Tyler'], //the array is stored separately
  //this is just a reference to the Array.
};
2
3
4
5
# Prototypes
When you build your own type of Object, you are building on top of the capabilities of the Object object. Your own object will automatically have access to all the properties and methods from
Object.
These shared properties are stored inside of an object called the prototype.
The prototype object is connected to the constructor function that was used to create your object.
let obj = new Object(); //the constructor method used to make `obj`
//creating an instance of `Object`
Object.prototype.hasOwn(obj, 'hello');
//calling the method `hasOwn` which exists inside of the prototype which
// is inside of Object.prototype
2
3
4
5
If you want to add new functionality to all instances of an Object type then you can add a property to that prototype. Say you wanted all Arrays to be able to log the word Array by calling a method
named whatru.
//add the method to Array.prototype object
//the key is `whatru` and the value is the function
Array.prototype.whatru = function () {
  console.log('Array');
};

let arr = [1, 2, 3, 4, 5];
//this is an instance of Array. So, it has access to Array.prototype
arr.whatru();
//output: `Array`
2
3
4
5
6
7
8
9
10
There is a prototype chain in JavaScript. When you try to call a method on an object, JavaScript looks inside that object for a method with a matching name. If found, it runs the method. If not found,
it will search up the prototype chain until it reaches the top of the chain, which is the null value. If it reaches the null without finding the property, this is when an error is created and
thrown.
Here are a couple examples of possible searches for a property in an object, following the prototype chain.
Array instance accessing prop => Array.prototype => Object.prototype => null
MyObject instance accessing prop => MyObject.prototype => Object.prototype => null
2
Notice that the last two are always Object.prototype and null.
# Approaches to Object Creation in JS
There are also other ways to create objects in JavaScript.
The Object constructor and Object literal were already discussed above.
There is also an Object.create() method which was introduced in ES 5, before the class syntax as a way to standardize working with prototypes. This approach lets you manage the property
descriptors too. The property descriptors are properties about each object property that control if they are readonly, or have a default value, or can perform validation or formatting on the values
of the properties.
You can use basic functions with the new keyword or factory functions to create your objects. See the video below for more details on these approaches.
A more common way recently is using the JavaScript class syntax. It looks like classes in other programming languages but really is just creating the same objects and prototypes as the other
approaches. It is referred to as syntactic sugar when a feature is designed to look like something else.
class MyObject {
  constructor() {
    //function called when you use `new MyObject()`
  }
}
2
3
4
5
You will learn more about JS Classes in the Hybrid portion of the course.
# ToDo This Week
To Do this week
- read all the content for modules 1.1 and 1.2
- start reading the Hybrid content and working on the Hybrid exercises
- Watch the YouTube Fetch Video (opens new window)