# Week 11 - PWA Continued
# Determine if Website or PWA
We can actually determine whether our web app is running as a basic website that has a service worker or if it was launched as a PWA.
Use the following script to determine the load context and add any custom code based on those circumstances.
//check if the app was launched from installed version
if (navigator.standalone) {
  console.log('Launched: Installed (iOS)');
  APP.isStandalone = true;
} else if (matchMedia('(display-mode: standalone)').matches) {
  console.log('Launched: Installed');
  APP.isStandalone = true;
} else {
  // console.log('Launched: Browser Tab');
  APP.isStandalone = false;
}
2
3
4
5
6
7
8
9
10
11
There is also a way that we can listen for changes to the display-mode. We can add an event listener to the window.matchMedia method.
window.matchMedia('(display-mode: standalone)').addEventListener((evt) => {
  let displayMode = 'browser';
  if (evt.matches) {
    displayMode = 'standalone';
  }
  // Log display mode change to analytics
  console.log('DISPLAY_MODE_CHANGED', displayMode);
});
2
3
4
5
6
7
8
# Testing for Online | Offline
The window object has an online and offline event that we can listen for.
//listen for on and off line events
window.addEventListener('online', (ev) => {
  //tell the service worker about the change to online
});
window.addEventListener('offline', (ev) => {
  //tell the service worker about the change to offline
});
2
3
4
5
6
7
The online and offline event is fairly dependable for telling us that a connection to the wi-fi network has been established or lost. However, it does not tell us about failures for the wi-fi network to actually get online. It also does not tell us if our connection is really poor. A one-bar connection to a network is still considered "online".
The default value for this can be found in the navigator object.
let isOnline = 'onLine' in navigator && navigator.onLine;
The example above, checks for existence of the onLine property and then find it's Boolean value.
# More Accuracy Through Testing.
We can make a fetch call from either the webpage or our Service Worker that uses the HEAD method instead of GET or POST, just to see if we get a response.
Use an endpoint that is guaranteed to be available, or use a test of your own API. Have a health check route that returns minimal data or accepts the HEAD method. If you get a response from the server then that can be used as proof of being online.
async function isConnected() {
  let req = new Request('/api/alive', {
    method: 'HEAD',
  });
  return await fetch(req)
    .then((response) => {
      return true;
    })
    .catch((err) => {
      return false;
    });
}
2
3
4
5
6
7
8
9
10
11
12
You will have to edit the above code sample to use a proper URL.
# Launching Native App Alternative
If you have a true Native application and you want to have the user be prompted to install a platform specific native version as an alternative to your PWA then you can update the web manifest file to have the mobile device prompt the user with their choices.
We have to add the following two settings in the web manifest file.
{
  "prefer_related_applications": true,
  "related_applications": [
    {
      "platform": "play",
      "url": "https://play.google.com/store/apps/details?id=com.example.app1",
      "id": "com.example.app1"
    },
    {
      "platform": "itunes",
      "url": "https://itunes.apple.com/app/example-app1/id123456789"
    }
  ]
}
2
3
4
5
6
7
8
9
10
11
12
13
14
If there is no native alternative then omit the prefer_related_applications setting or have it set to false.
# Enhanced Install Experiences
With a Chrome based browser we have access to that deferred install prompt event discussed last week.
When we feel that it is a good time to ask the user to install we used this code to prompt them:
if (APP.deferredPrompt) {
  APP.deferredPrompt.prompt();
  APP.deferredPrompt.userChoice.then((choiceResult) => {
    if (choiceResult.outcome === 'accepted') {
      console.log('User accepted the install prompt');
    } else {
      console.log('User dismissed the install prompt');
    }
  });
}
2
3
4
5
6
7
8
9
10
This will display the built-in install prompt.
However, other browsers have different mechanisms for allowing the user to add an app to the home screen called A2HS (install it).
We can add our own UI elements for the user to click to initiate the install. Fine for Chrome but on the other browsers we need to display instructions on how to Add to Home Screen.
On a desktop browser you can expect to see a small icon in the location bar. Here is an example of the Safari A2HS button on Safari desktop.

Note the small square with the upwards pointing arrow, on the right side of the image.
# On iOS Safari
On Safari on iOS you will see a button in the menu that is similar to the Safari desktop one. ![]() Clicking this will give the user Sharing options dialog which includes
Clicking this will give the user Sharing options dialog which includes Add to Home Screen.
![]()
# On Firefox Mobile
On Firefox the user can open the browser menu like the one below, and find an item called either install or add to homescreen.
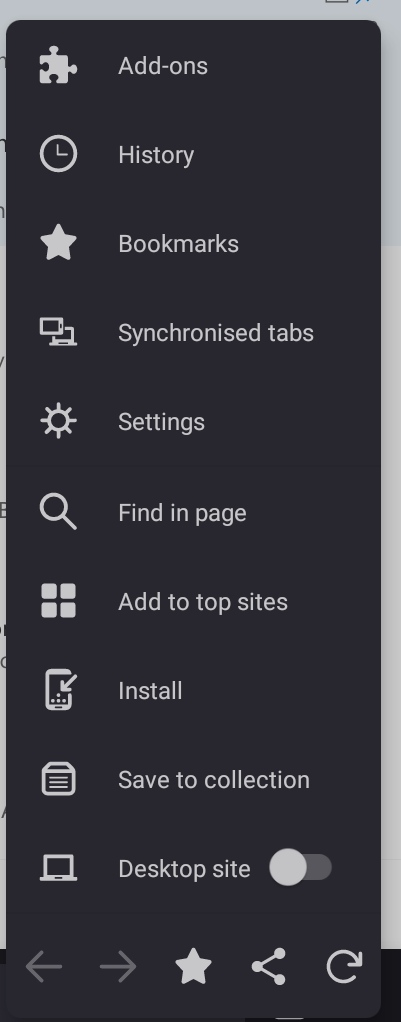
Or in the location bar when on Firefox desktop:

For Firefox there may also be an Add to Home Icon in the mobile version. It looks like a small house with a plus sign. It will depend on which version of Firefox that your users are using.
# On Chrome Mobile
Similar to the the Firefox mobile menu you will find a button and label in the menu called Add to Home screen.
For Chrome, remember that you will also automatically be prompted to install a PWA if all the installation requirements are met.
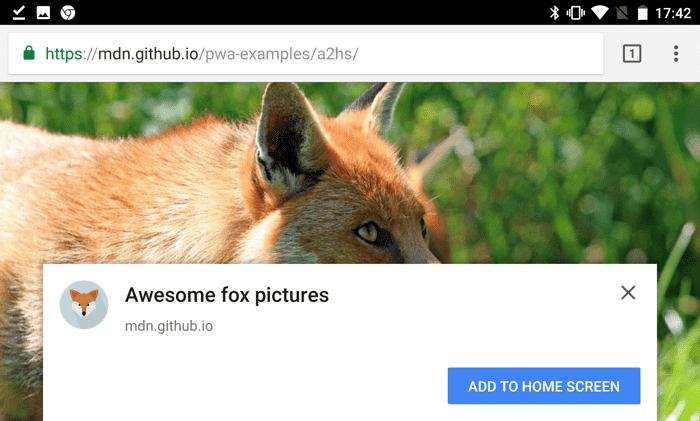
This is what the banner would look like if you were not controlling the process on Chrome with the beforeinstallprompt event code.
# How you can Ask Users to Install
There are a number of ways that we can encourage a user to install.
Remember, asking them too early will drive most people to ignore the option from that point onward.
- A simple install button on the page. Put the button in an obvious location. Be sure to add some explanatory text about what install means. You can put this button near the bottom of the page or in a location that appears after they have already interacted with some content on your site.
- An install button in the header of each page. Make it part of the navigation options.
- If you have a slide out navigation menu, put it at the bottom of the menu.
- A custom install banner. Have a look at the install banner that comes with chrome. Use this as a basis for creating your own styled banner that appears in any browser.
- A dismissible Snackbar near the bottom of the page. Try not to interfere with any task that the user would be trying to accomplish. You want to be noticeable without being annoying. Remember to wait long enough before displaying.
- If there is an ordering or checkout process in your app then having an install option here is an excellent choice. As they finish their order and you are thanking them and providing a tracking number, remind them that they can install your app and give them some reasons why they might want to.
For all of these options you have the ability to style the button to match the style of the rest of your site.
For any of these install prompts you will need to have a screen where you outline to users, who will nearly always be less technically savvy than you, how to actually install the app.
Read more about encouraging users to install on web.dev (opens new window) and more about building your own install ui (opens new window).
Read more about the install process for users on different platforms (opens new window)
TODO
- Read the content and watch the videos for Weeks 9, 10, and 11
- Watch the video series on Service Workers (opens new window)
- Watch the video series on Indexed DB (opens new window)
- Watch the video series on PWAs (opens new window)
- Finish the 3rd Project - PWA